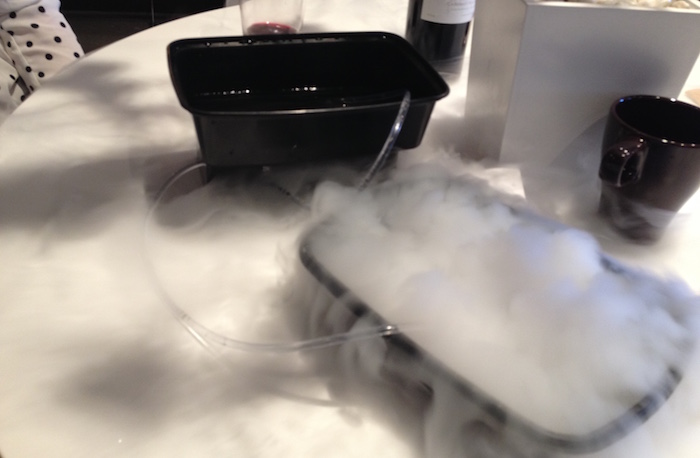
Last weekend brought an interesting challenge: to create a remote-controlled, small-sized dry ice “fog” dispenser for a company event. In the end it wasn’t used, but I had a lot of fun building it anyway. Here is how it was done:
Hardware
Fog machines usually heat dry ice (solid CO₂) pellets with hot water. Its sublimation produces a very convenient fog: mostly harmless for humans, leaves no residue and won’t float (therefore not triggering fire alarms). Given the short time, I skipped the heater (would just have a pre-heated water container) and focused on pumping the water with some sort of wireless control.
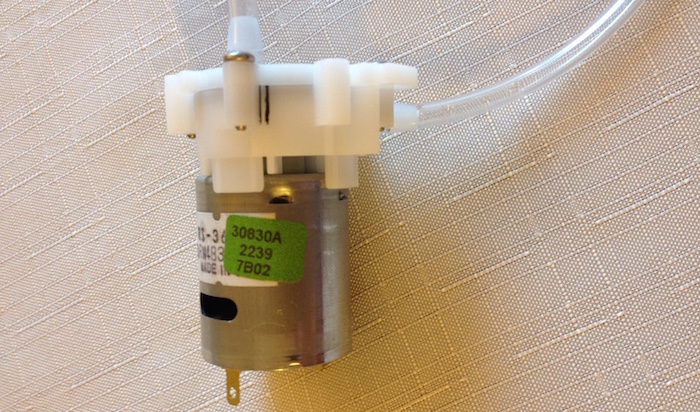
Creatron Inc.’s website had a few non-expensive liquid pumping motors, but they were a bit chunky and power-hungry, whereas I wanted a battery-powered small gadget. But I got lucky: the physical store had a water pump motor that worked on a 3.3-9V range and was even cheaper (less than $5). It did not include the tubes, but the Home Hardware across the street had them.
My initial idea was to have a Raspberry Pi exposing a web interface to start/stop the motor, and operate it from a phone via Wi-Fi. Cool, but clumsy: the Pi would need to either auto-login on Wi-Fi, or provide its own network; it would require dynamic DNS, booting a full Linux stack and so on. And power would become an issue again.
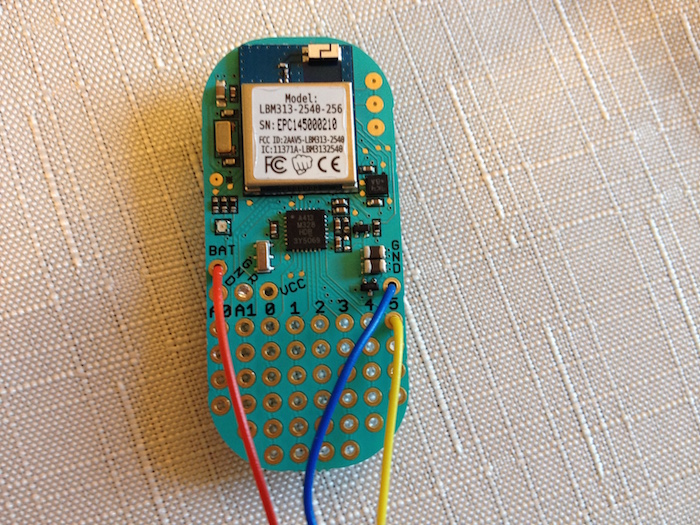
I settled for an Arduino with a Bluetooth shield. That would require coding a client for the phone, but the hardware would be sturdy, efficient and instant-on. Also, a search on the magic kingdom of my electronics parts drawer yielded a LightBlue Bean, which I purchased on their Black Friday promotion, but never used.
The Bean is is a tiny Arduino-compatible microcontroller with a built-in Bluetooth module. That was all I needed, squeezed in a small and energy-efficient package. It even includes a few extras that I didn’t need (but are quite cool), such as a 3-color led and an accelerometer. Check the video.
Sadly, we can’t simply plug the motor on the Bean and let it switch the motor on and off, because even a full-size Arduino can’t directly power a motor. A common solution is to use a transistor - an “electric switch” that only allows the large current to flow between motor and batteries when the smaller current from the Arduino pin is present.
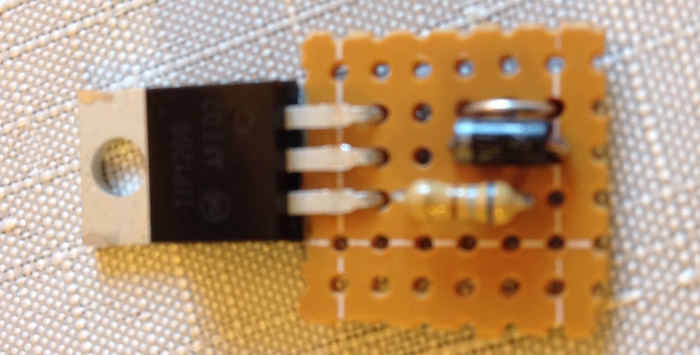
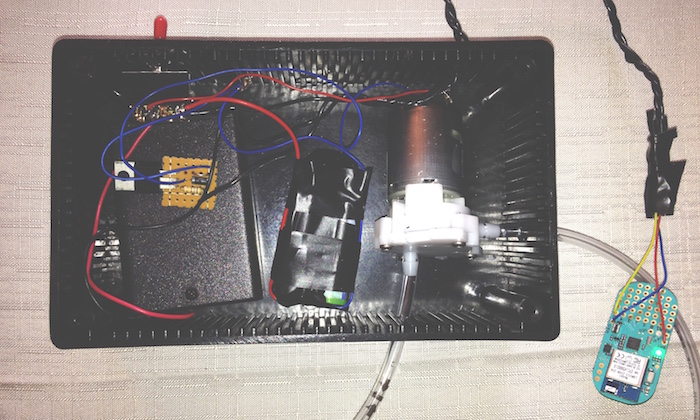
Interfacing microcontroller, motor and transistor requires a couple extra components (see below). Those could be soldered on the Bean’s convenient protoboard space, but I didn’t want to commit it to a single-use project. A piece of breadboard did the job.
The first version had the Bean on a “tail” going out of the box, allowing the signals to go past the metal structure where the little machine would be installed. I also replaced the Bean’s coin-sized battery with 2 AA ones (separated from the motor’s 3), saving the tiny one for when I really need its diminutive form factor.
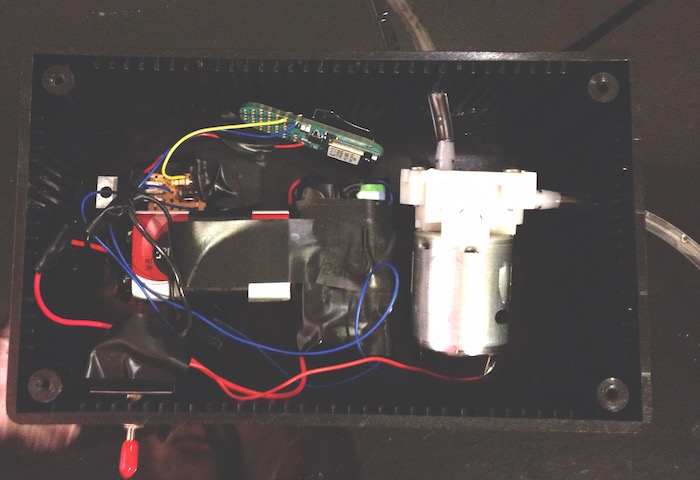
At this point, the company opted for another solution, so I shrugged and moved the Bean back inside. I also maxed out the motor voltage by replacing its 3 AA batteries with a single 9V one.
Here are the parts list and schematics (source):
- 3.3-9V water pump motor;
- LightBlue Bean (or an equivalent Arduino + Bluetooth shield);
- TIP120 transistor;
- 600Ω resistor to limit the current between the Bean and the transitor (1KΩ is the usual value, but I had that one handy);
- 1N4004 diode between the transistor terminals, which will avoid damage to the transistor by capturing any reverse current generated by the motor (e.g., when it stops or if liquid reflux makes it run backwards). You can replace it with pretty much any power diode;
- 2 AA batteries (for powering the Bean with 3V);
- 9V battery (or 3 AA batteries if you are fine with 4.5V for the motor);
- Dual switch (so we can manually turn both the bean and the motor off when not in use, just in case).
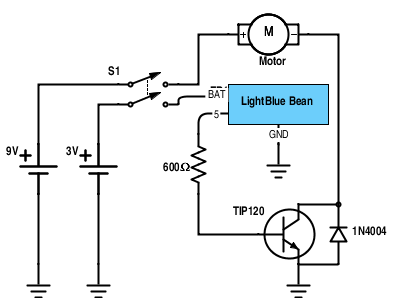
I derived most of this from these NYU and Instructables projects, which have more detailed schematics, illustrations and explanations. You may want to check those before building your own. Pin 5 was picked for soldering convenience - any digital or analog pin would do.
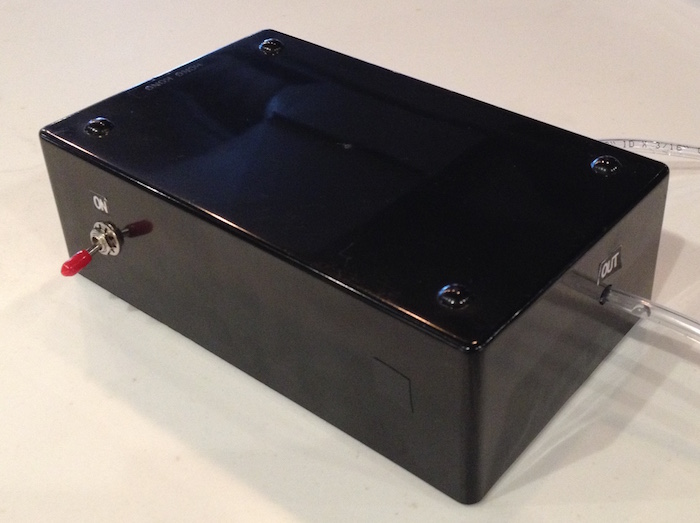
The box (also from Home Hardware) was made of plastic, making it easy to open/mold the necessary holes with a Dremel. The final result was not too shabby, I must say:
Software
To make the bird sing, I’d need two pieces of software:
- An app (running on my phone) showing a control button and forwarding the press/release events to the Bean;
- A little piece of Arduino code (running on the Bean) that would receive those commands and switch the transistor on and off according to them.
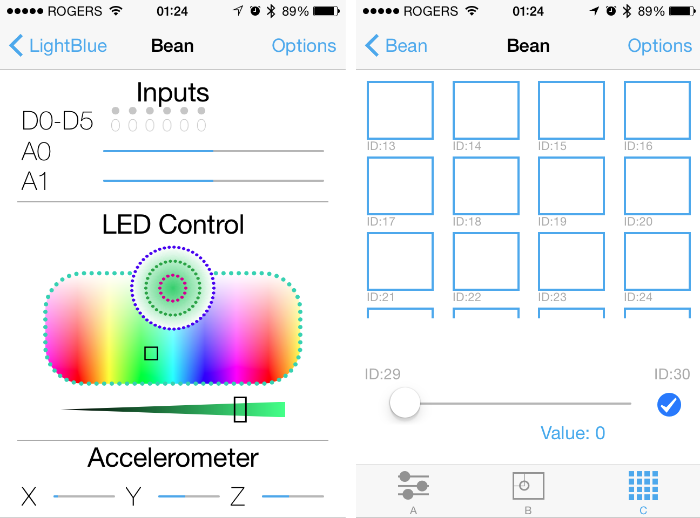
LightBlue is a Bean-provided iOS app that saved the day. Its “Sandbox” mode (right screenshot) shows a fixed set of sliders, buttons and UI elements. When you interact with those, the app send commands to the serial port - just what I needed on the phone, so I could focus on the second part.
Bean code is developed just like with any Arduino, that is, using the open-source Arduino IDE. But I had a showstopper: Bean Loader (the OS X add-on that connects the IDE to the Bean) only works with an ancient version of the IDE, which, in turn, requires an equally old JVM that was not an option for me.
Plan B: use their iOS sketch editor (confusingly also named Bean Loader), which uploads directly from the iOS device to the Bean via Bluetooth. Throw in an external keyboard and my iPad mini became an effective (if minimalistic) code editor, enough for writing this:
void setup() {
  Serial.begin(57600);
  pinMode(5, OUTPUT);

  // Motor (pin 5) off on startup
  digitalWrite(5, LOW);
}

void loop() {
  char buffer[64];
  size_t length = 64;

  length = Serial.readBytes(buffer, length);

  // If we got a message from the first button (ID 13),
  // turn off/on motor, according to it being a press
  // (0) or a release (1).
  if ((length > 0) && (buffer[0] == 13)) {
    if (buffer[1] == 0) {
      digitalWrite(5, HIGH);
    } else {
      digitalWrite(5, LOW);
    }
  }

  // Sleep until we get some I/O
  Bean.sleep(1000000);
}
Pump It Up
Here is a test with room-temperature water. On such conditions, even the initial (4.5V) version pumps pretty nicely:
The next video shows the first dry ice experiment. Even though the fog didn’t spread much (due to the bowl height), it generated a lot of fog, even from a reused block of dry ice:
The picture that opens the post shows the result with an appropriate recipient and new pellets. There are only two caveats to keep in mind:
- The motor can’t withstand near-boiling water (no harm done when I tried - it just didn’t move, but worked fine again once the water cooled a bit);
- The code can be improved. For example, it doesn’t process multiple messages received on the same package (meaning the stop command got lost if I pressed and released the button too quickly).
Despite those minor things, it was a fun experiment. I could imagine a bunch of other applications. You could build a remote controlled robot that would prepare a custom drink (the fancier motors that are guaranteed not to touch the liquid, to ensure purity). Add some wheels, extra motors and a bow tie, and it can even serve you the drink. How about that?